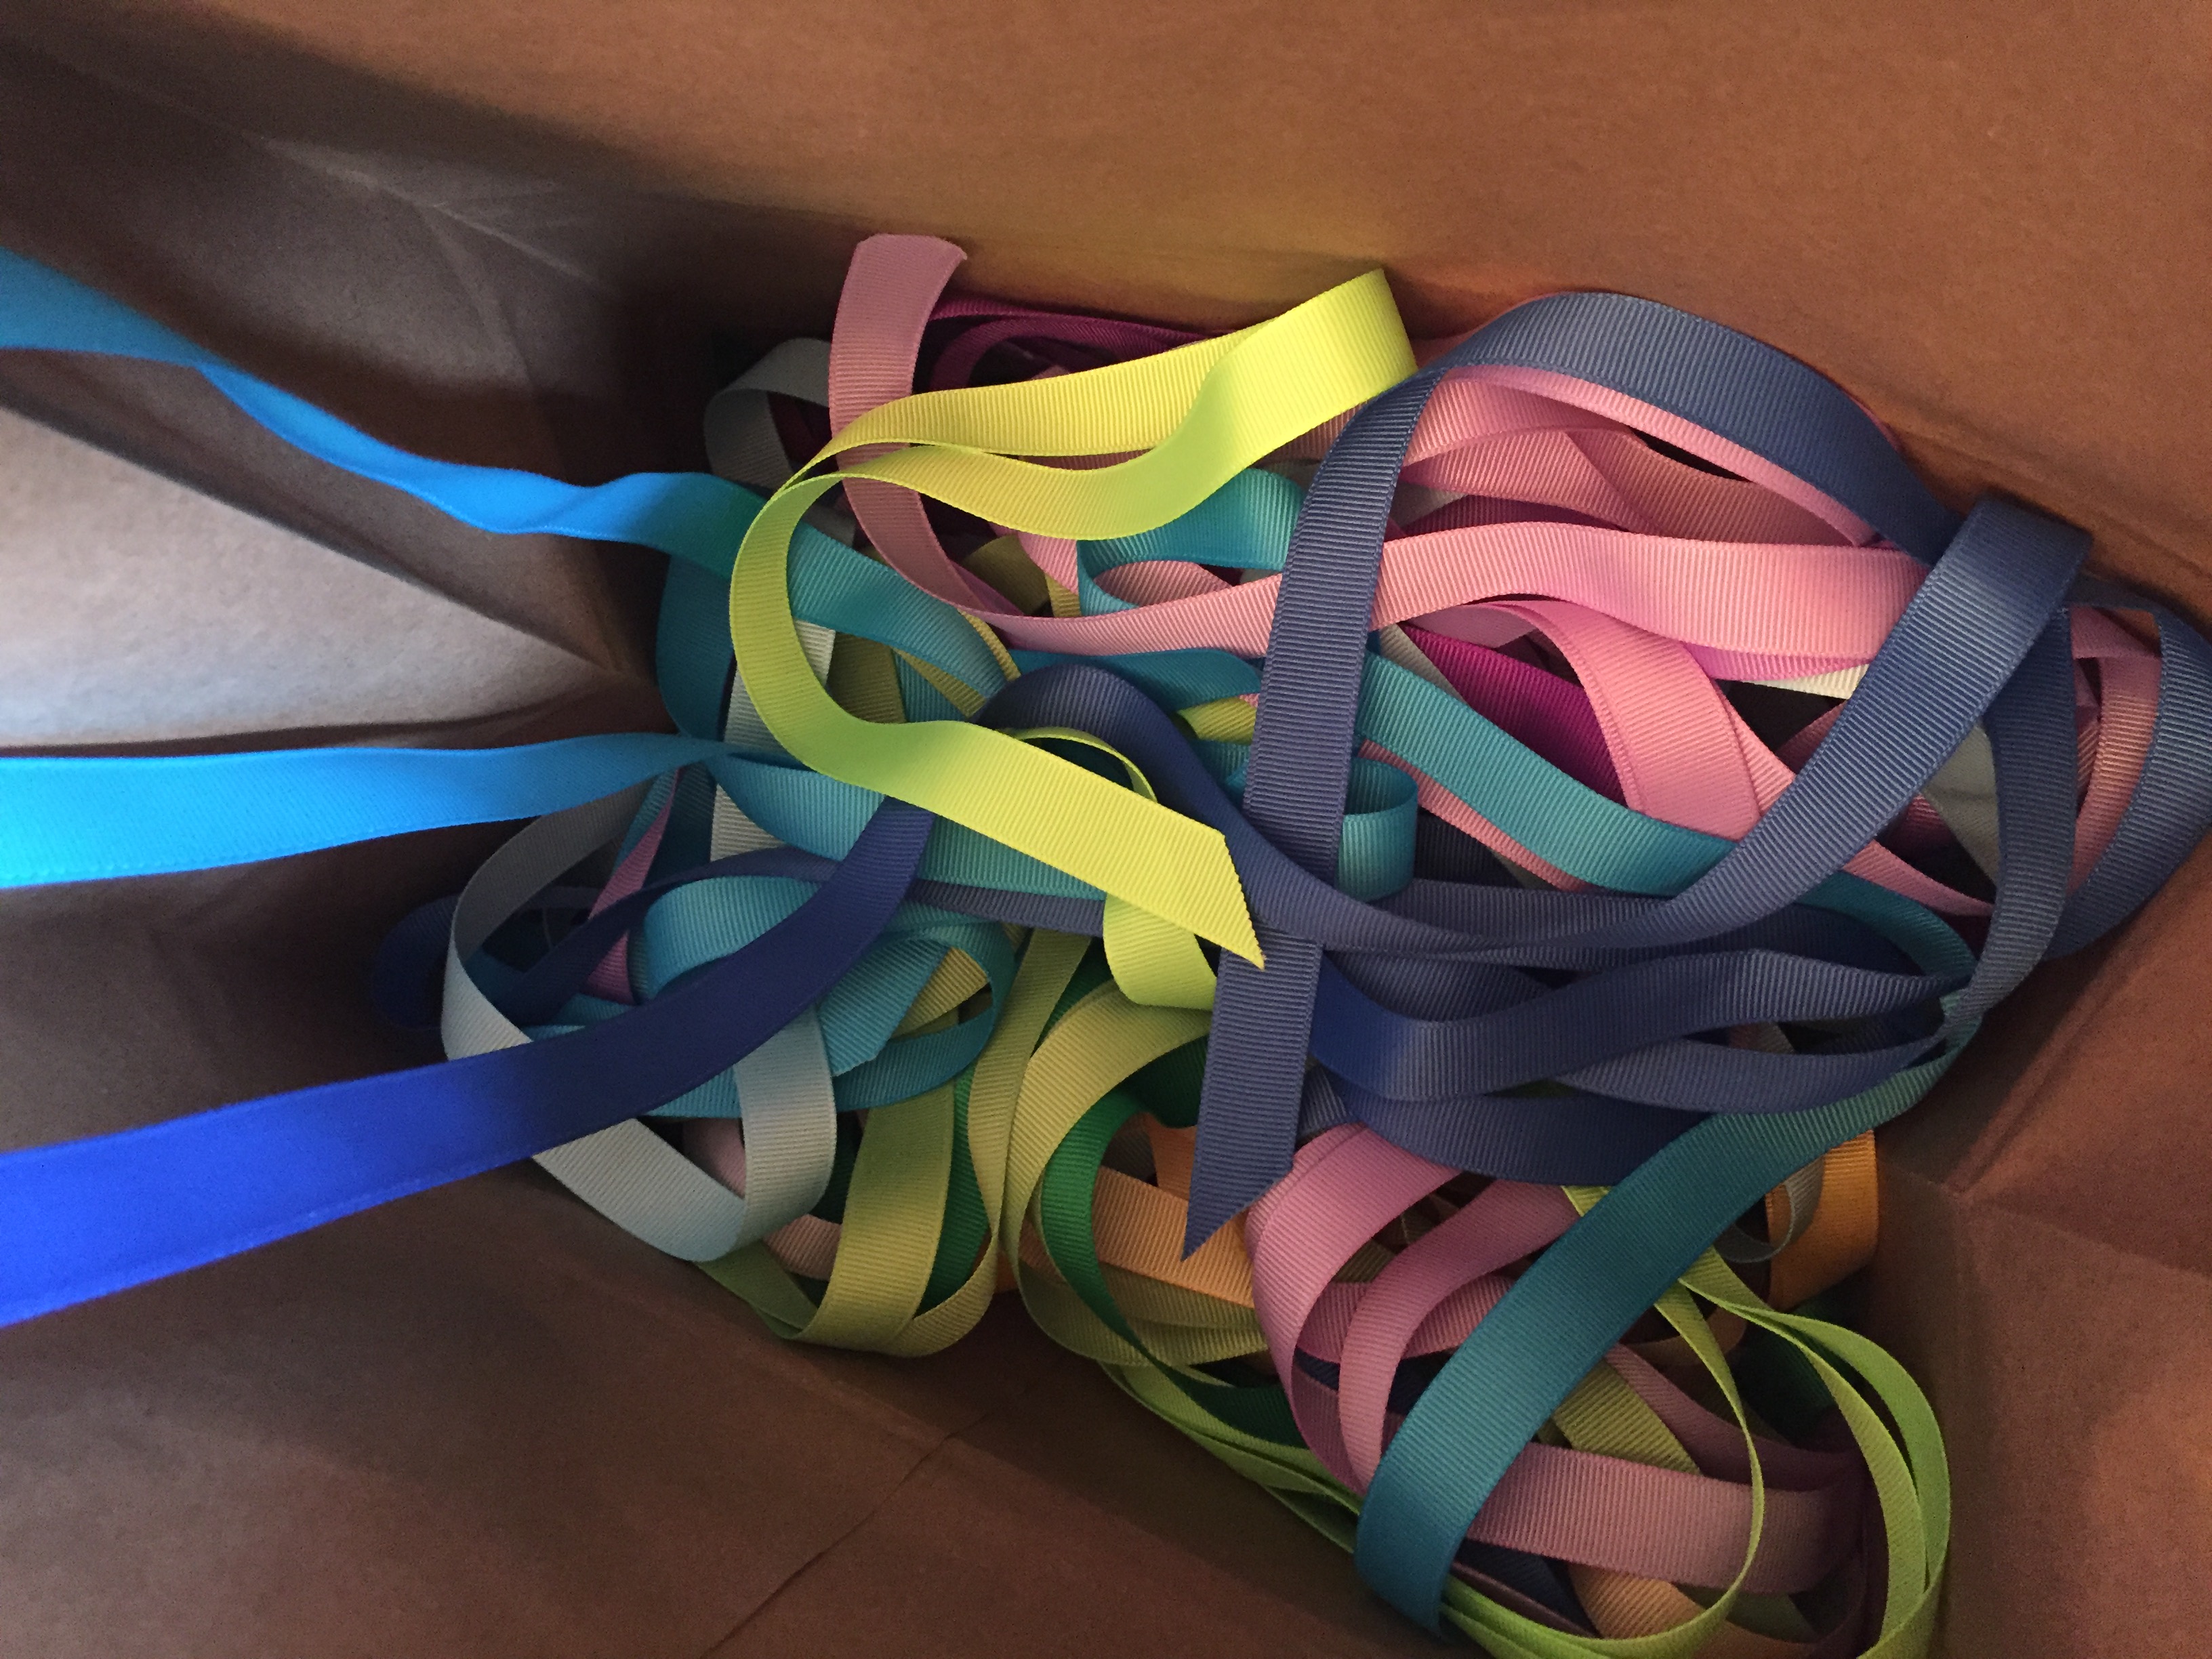
The ribbons originally used in the ceremony to bless our minister upon her return from her sabbatical were a variety of lengths from about three feet to nearly five feet long–a rainbow of colors!
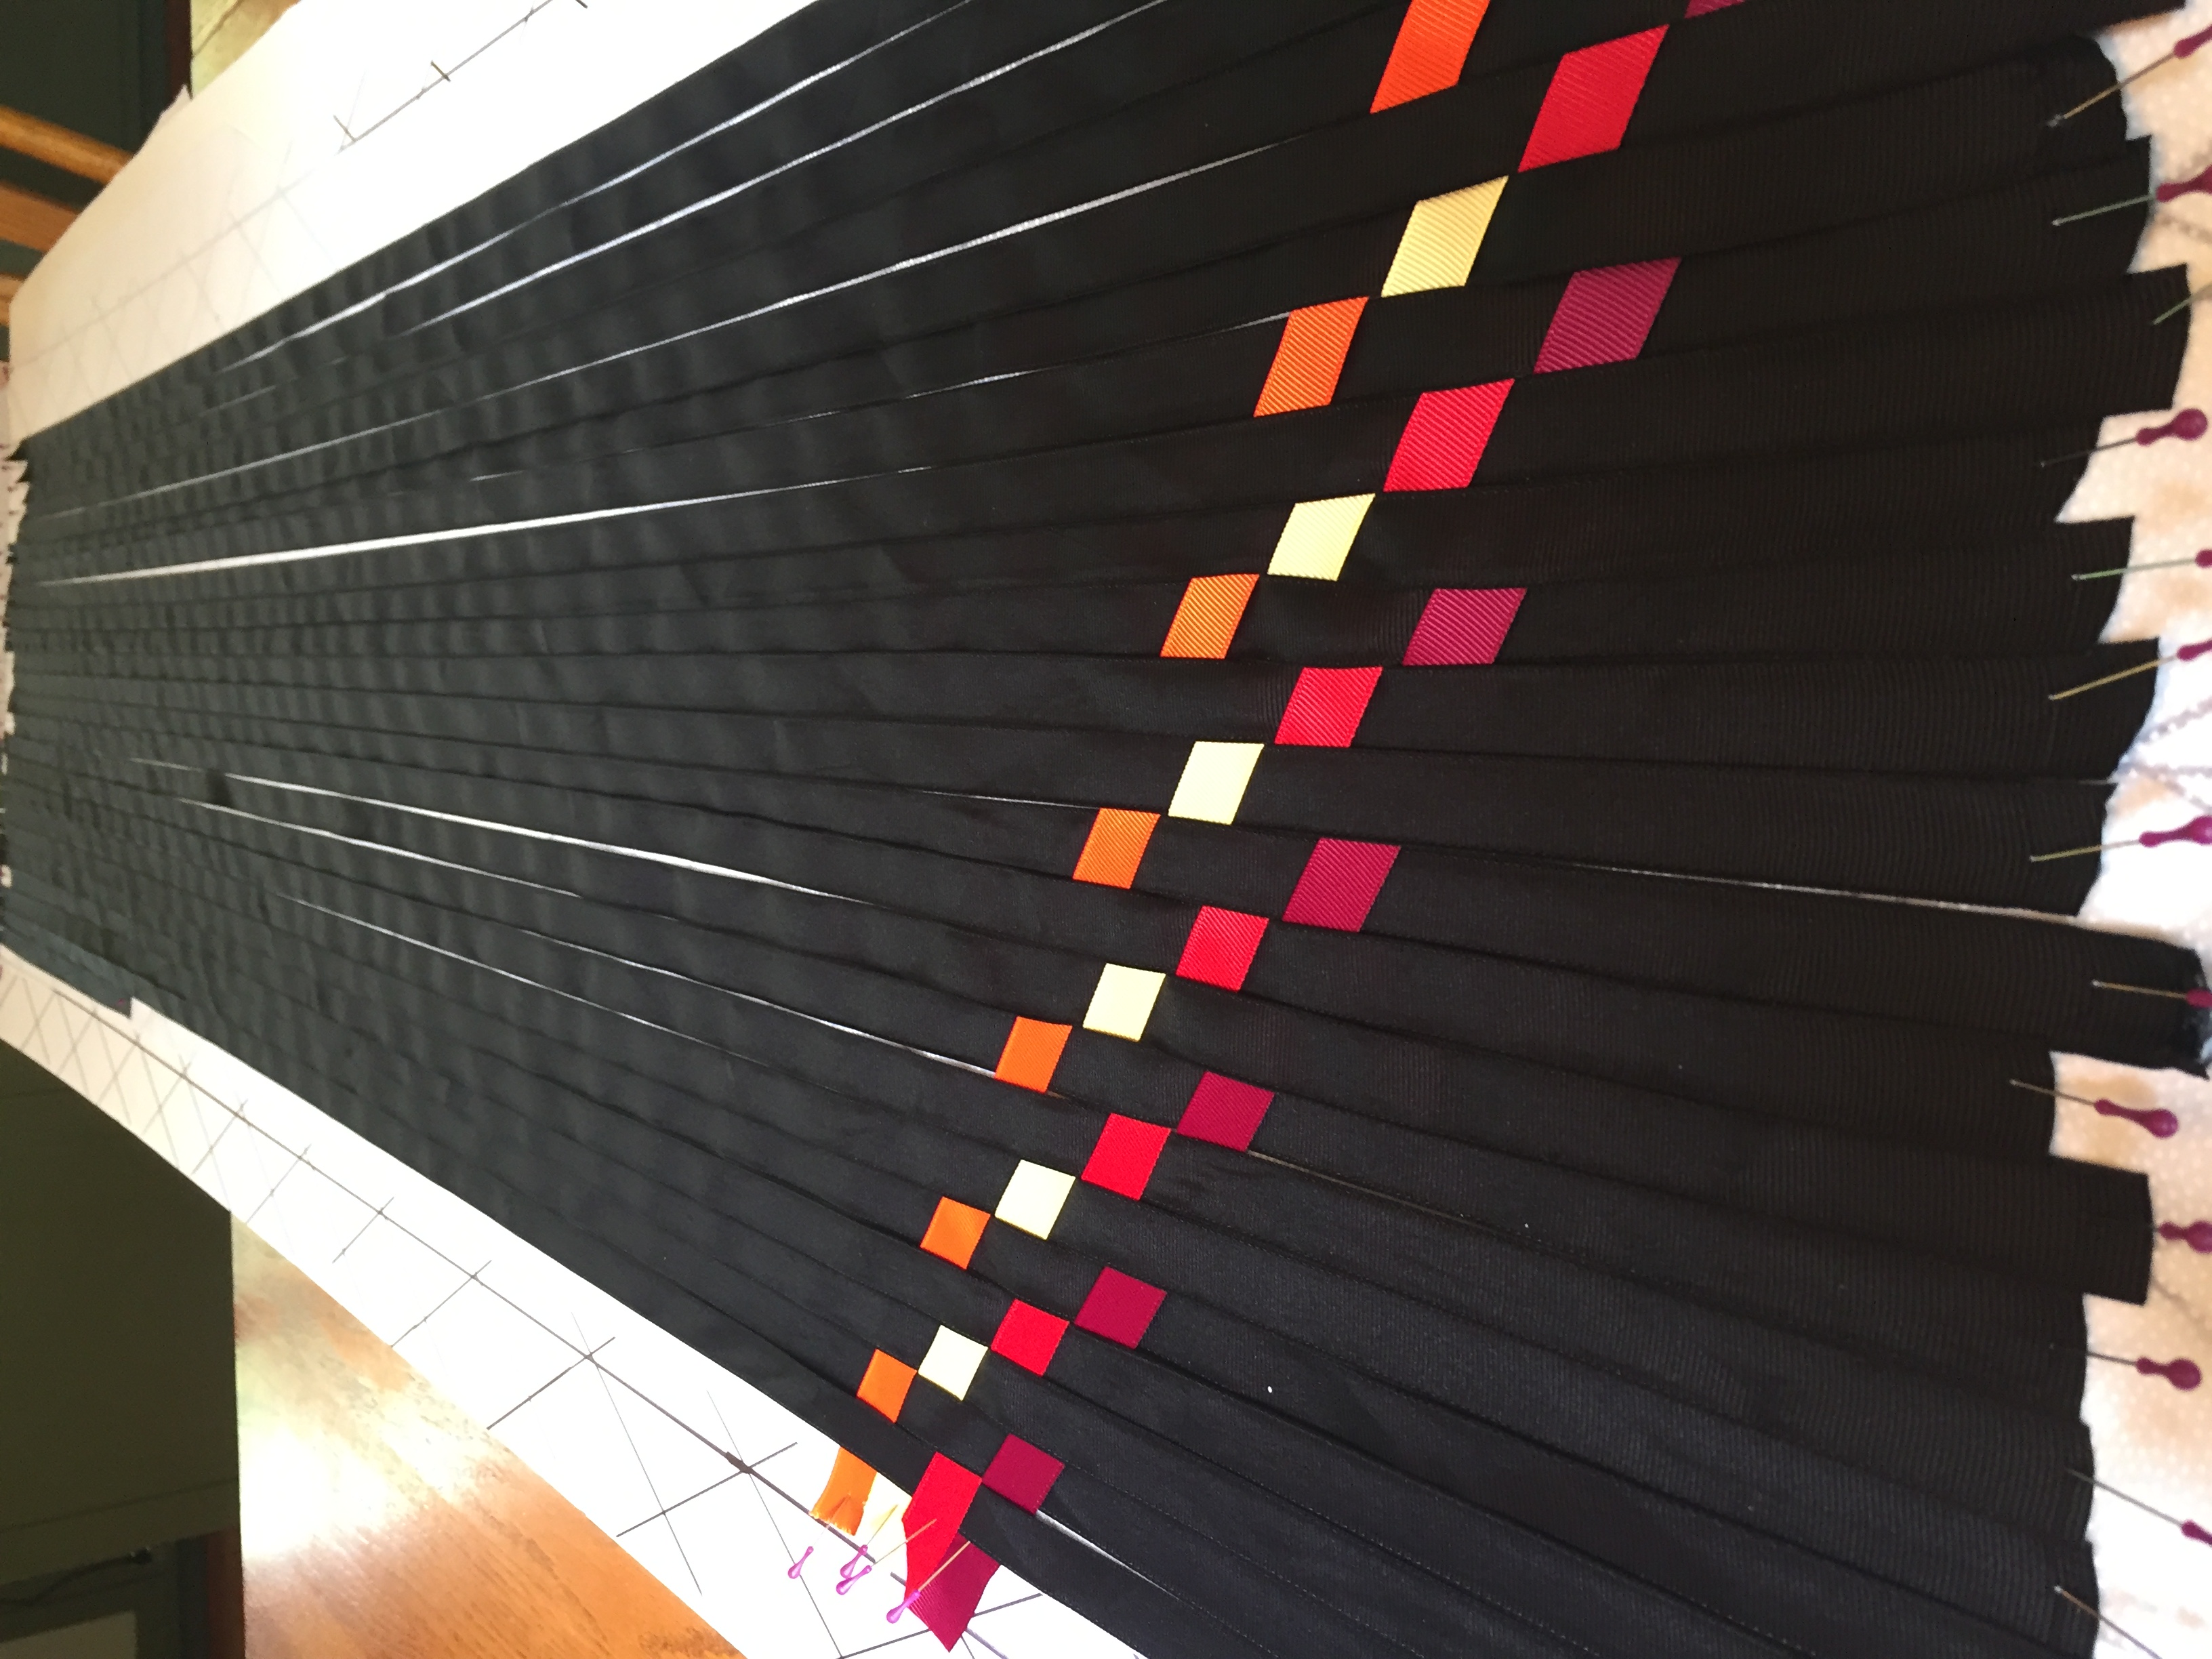
After some research, I discovered something called “triaxial fabric weaving.” And, honestly, Mr. Domestic saved my creative butt on this one. He has a bunch of videos on his website that show how he weaves amazing fabrics. Once I saw what he was doing with folded fabric, I adapted it to the ribbon.
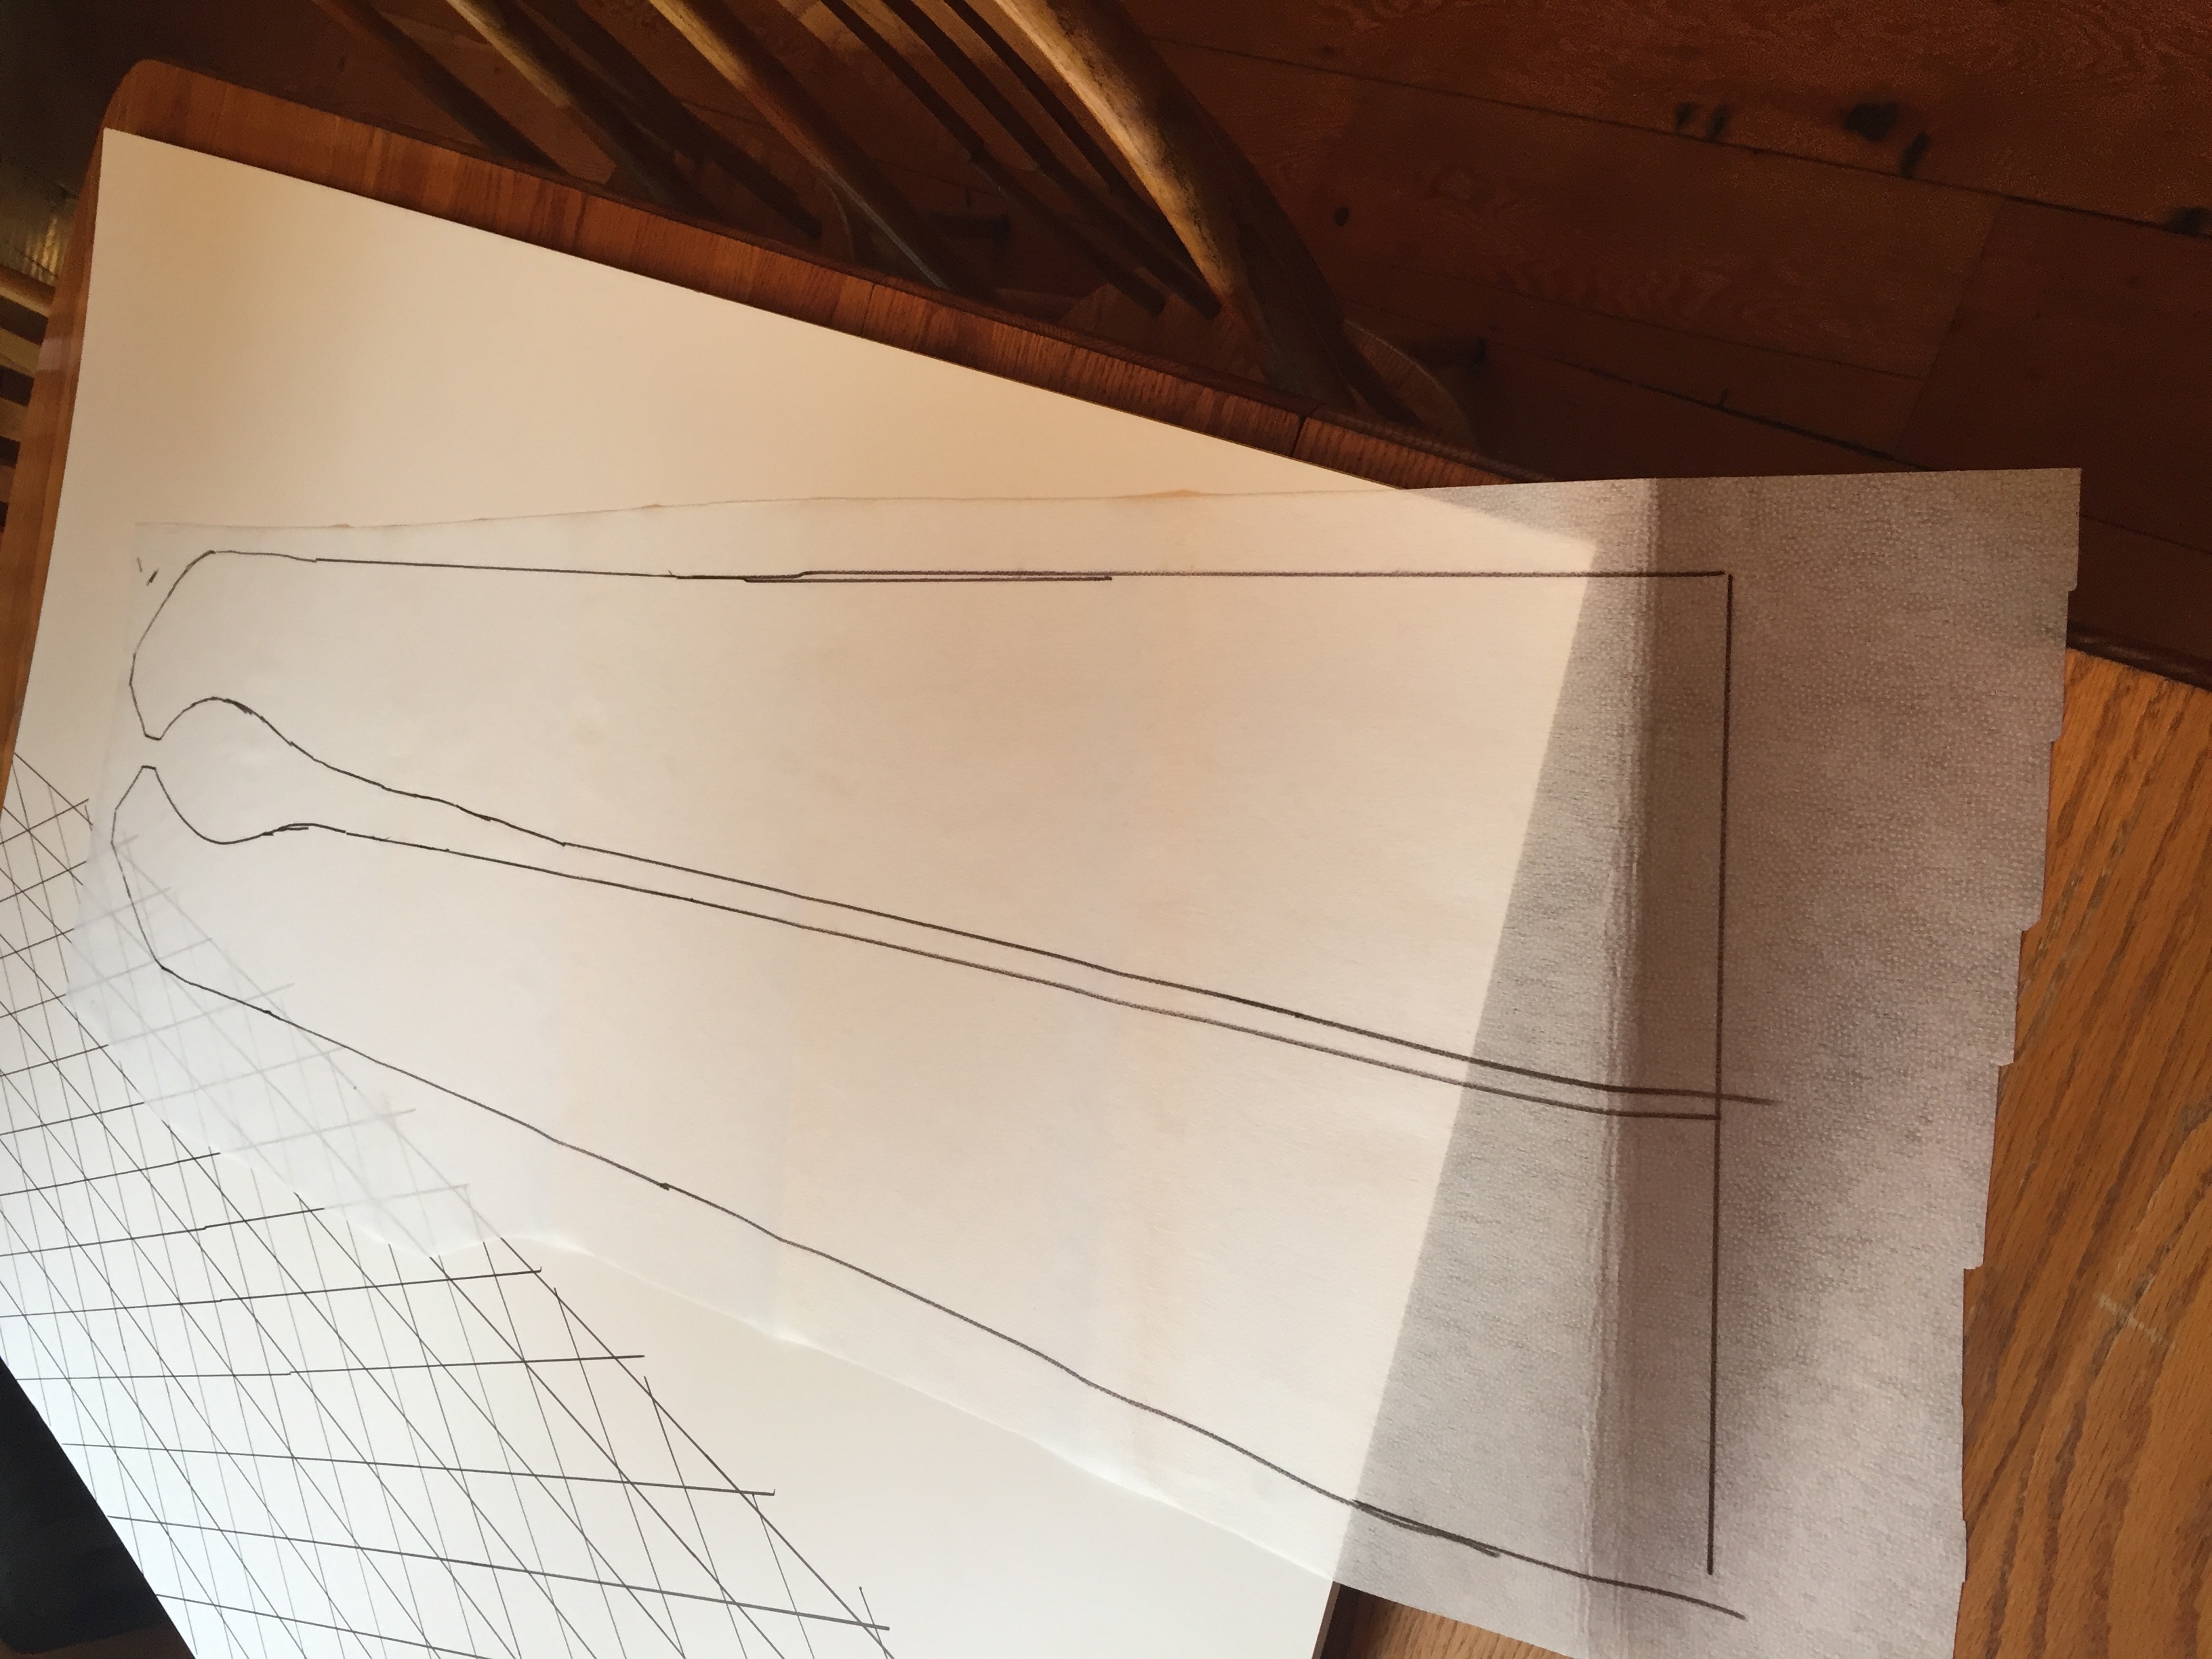
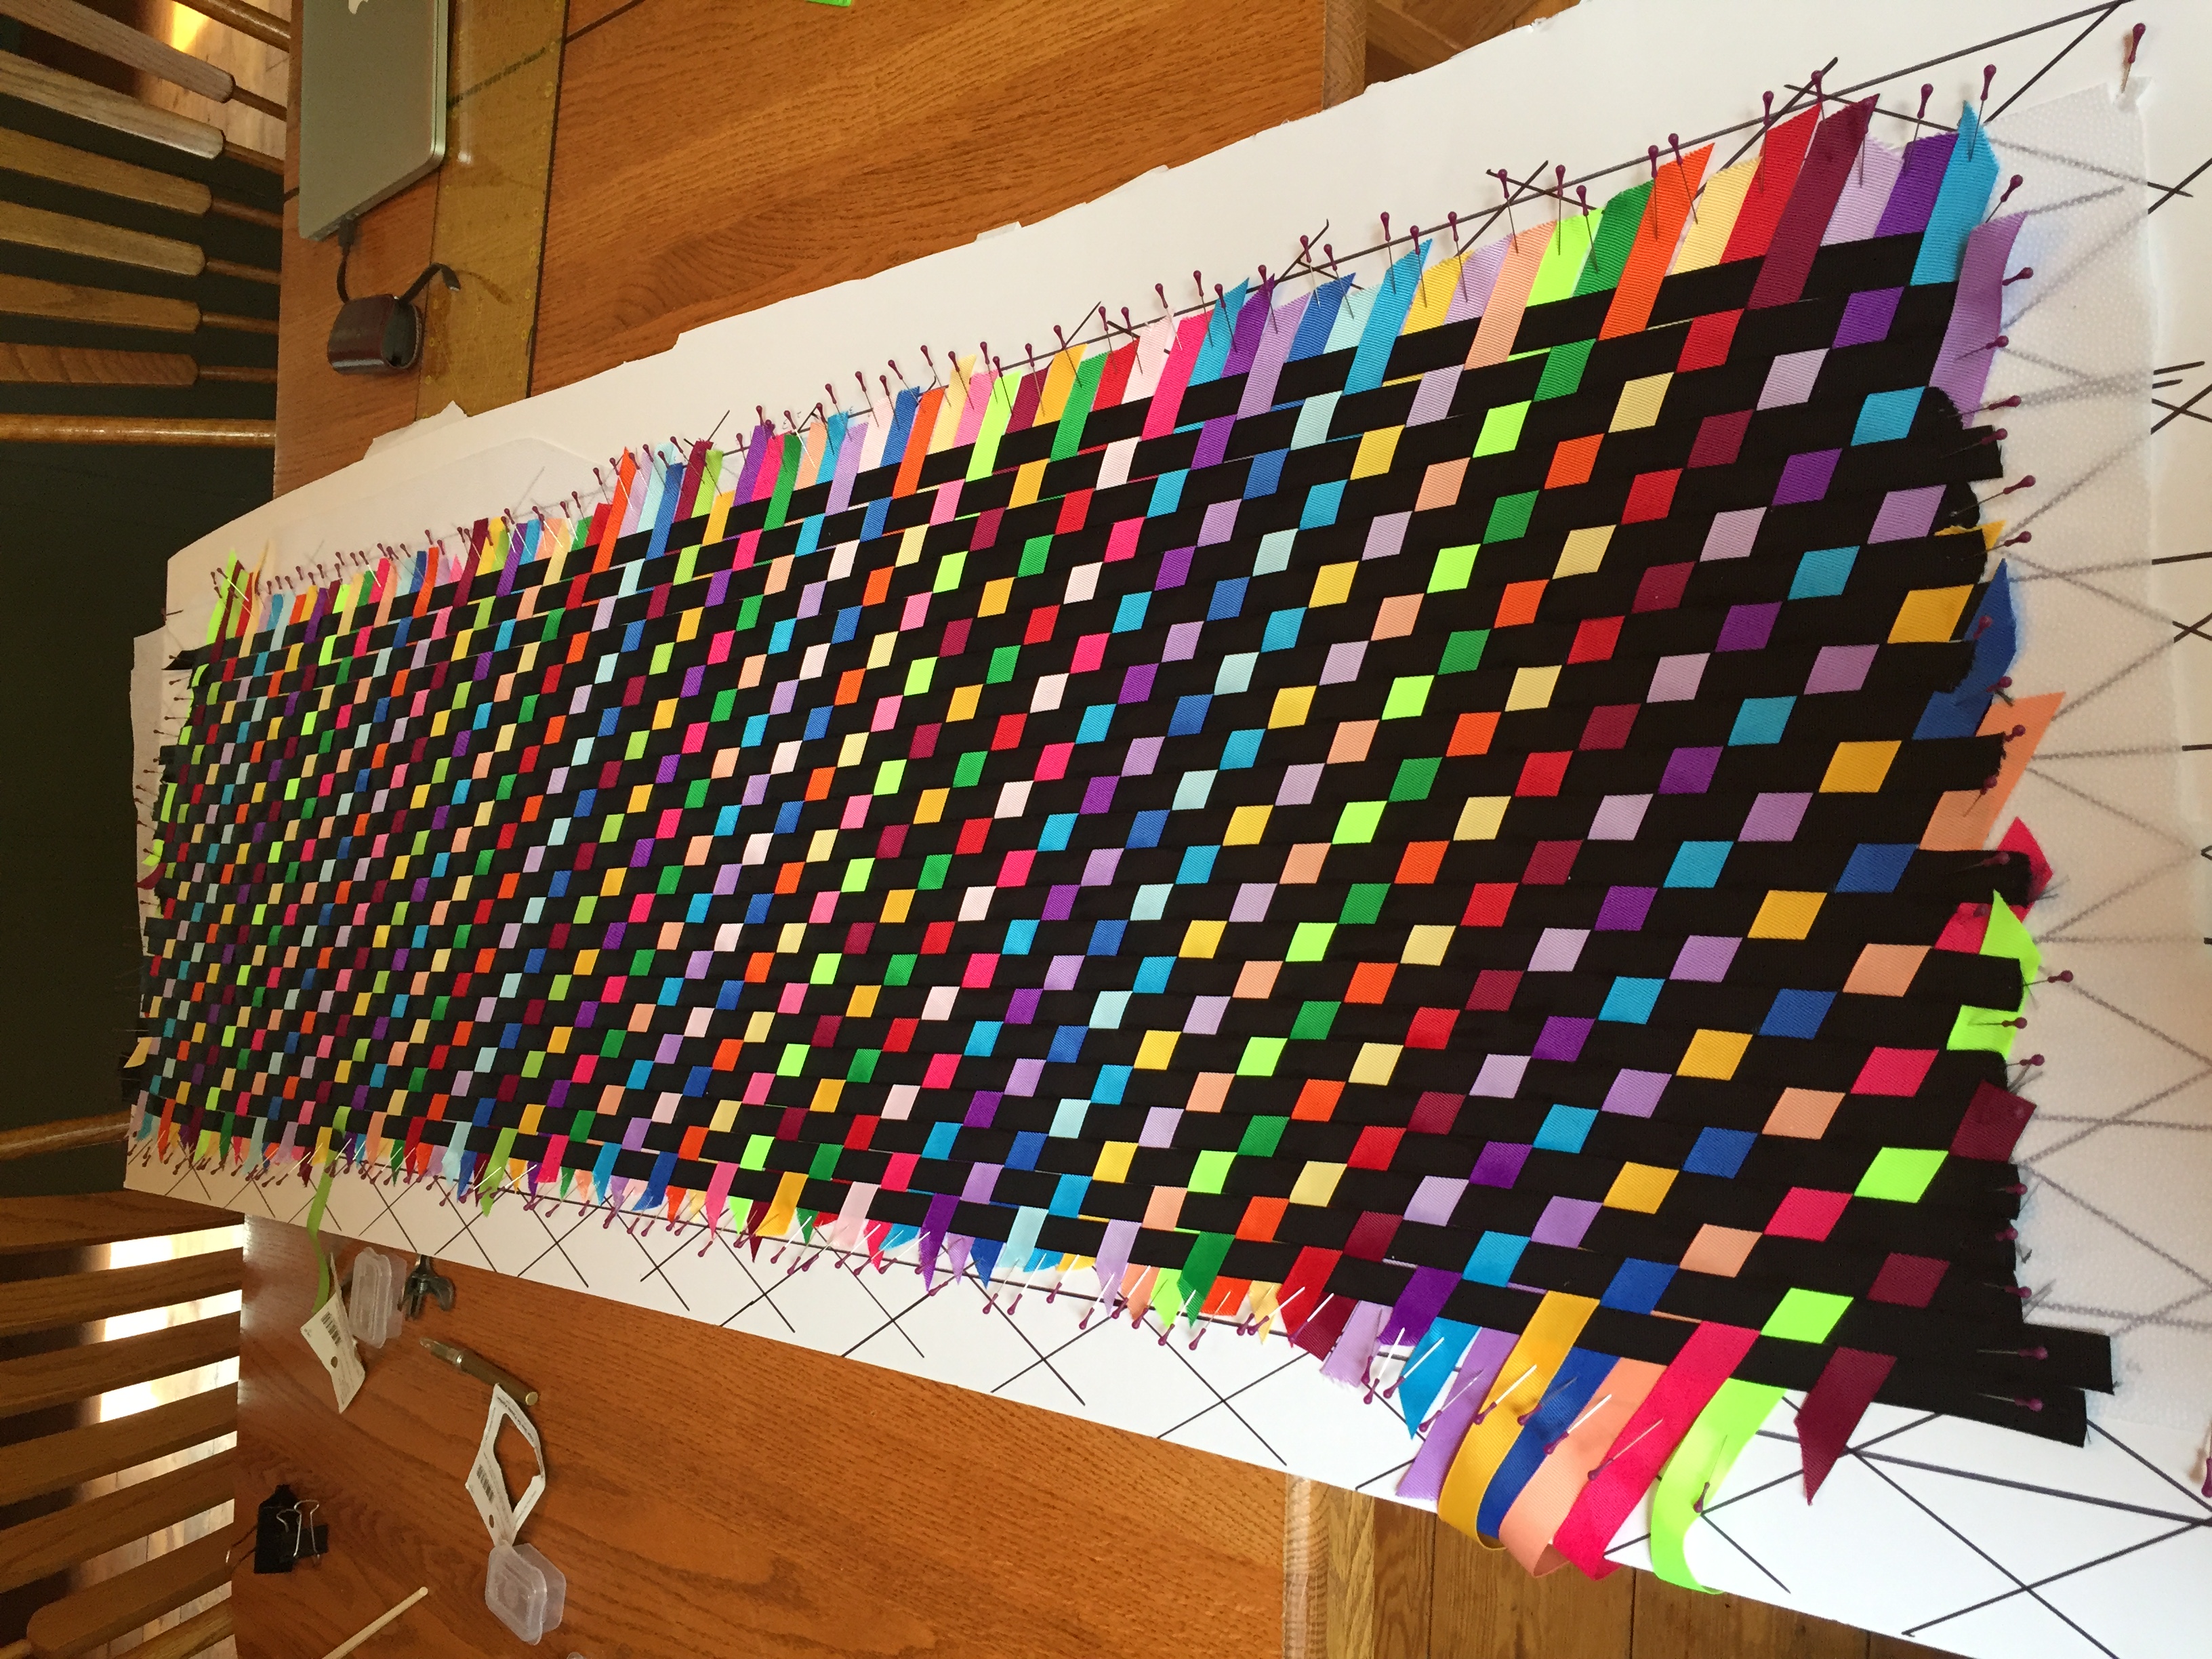
I decided to create a fabric big enough to cut both pieces of the stole front. Mr. D has tutorials on how to make a grid, cover the grid with a fusible interfacing glue side up, and then weave over the top. Once the weaving is done, the fabric is ironed to the interfacing and secured with a line of stitching around the outside edges. Once secured with sewing, the pieces can then be put together like any other fabric. (I’m simplifying a lot so this post doesn’t become a book.)
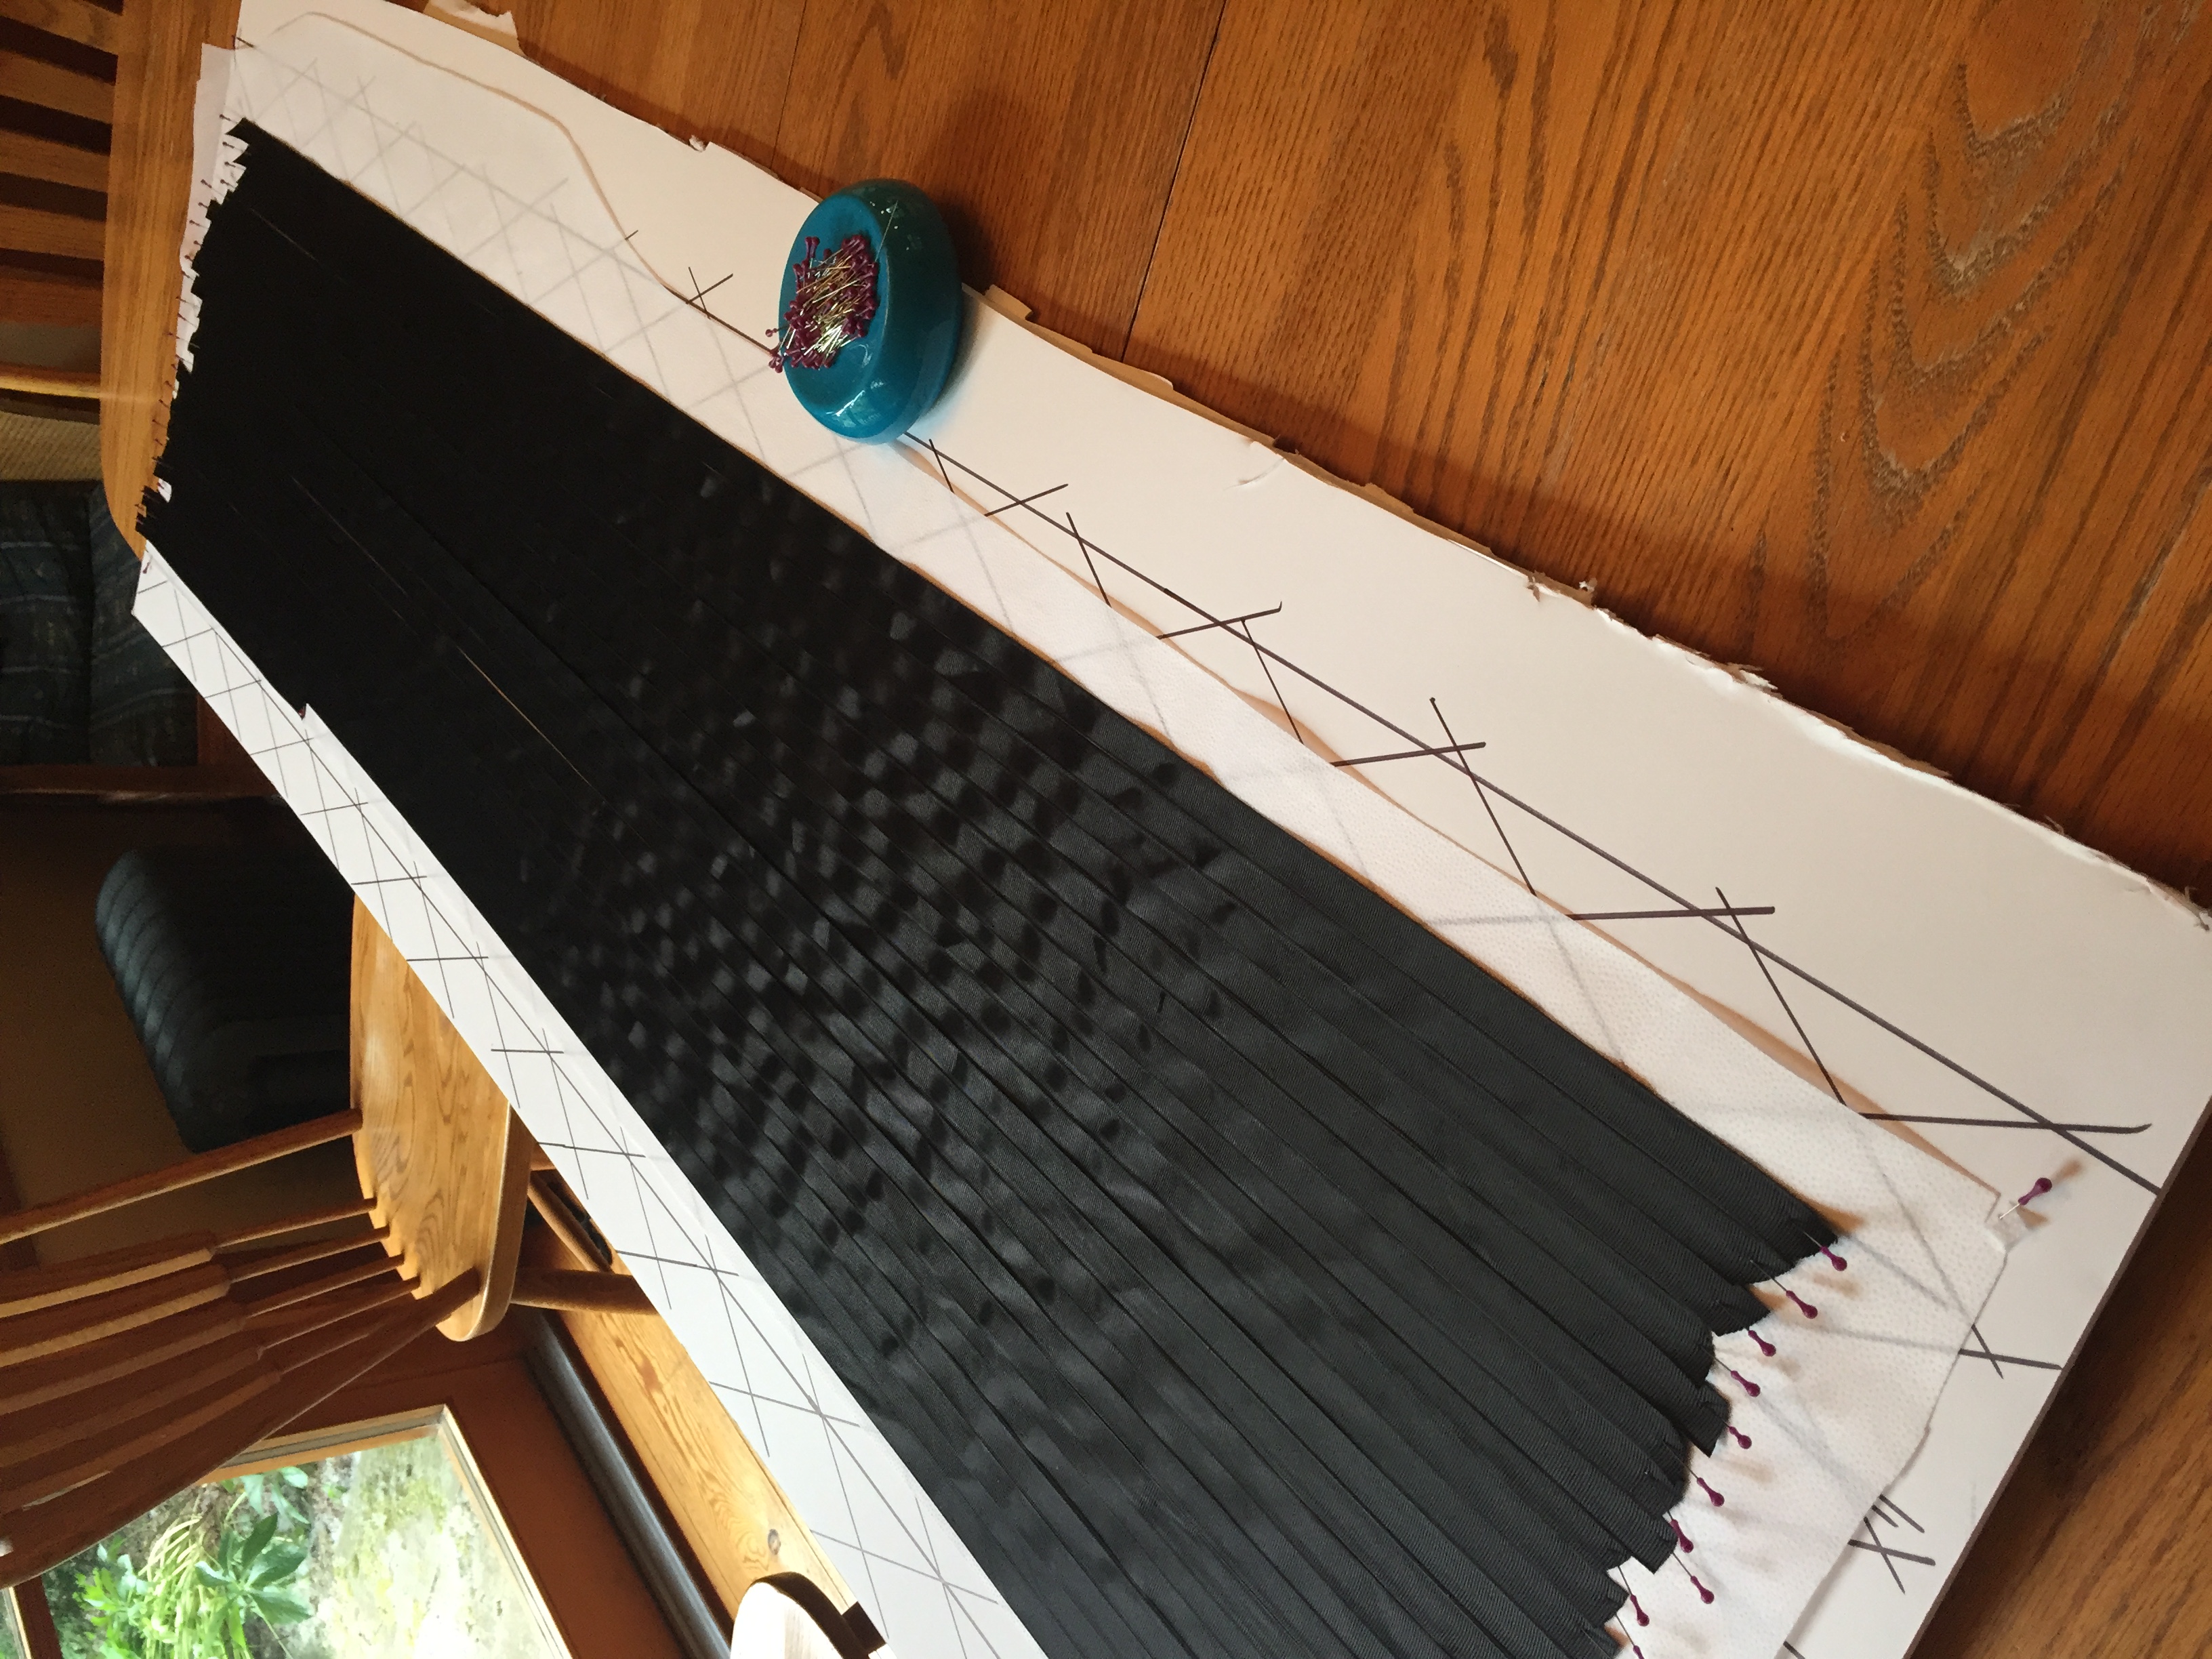
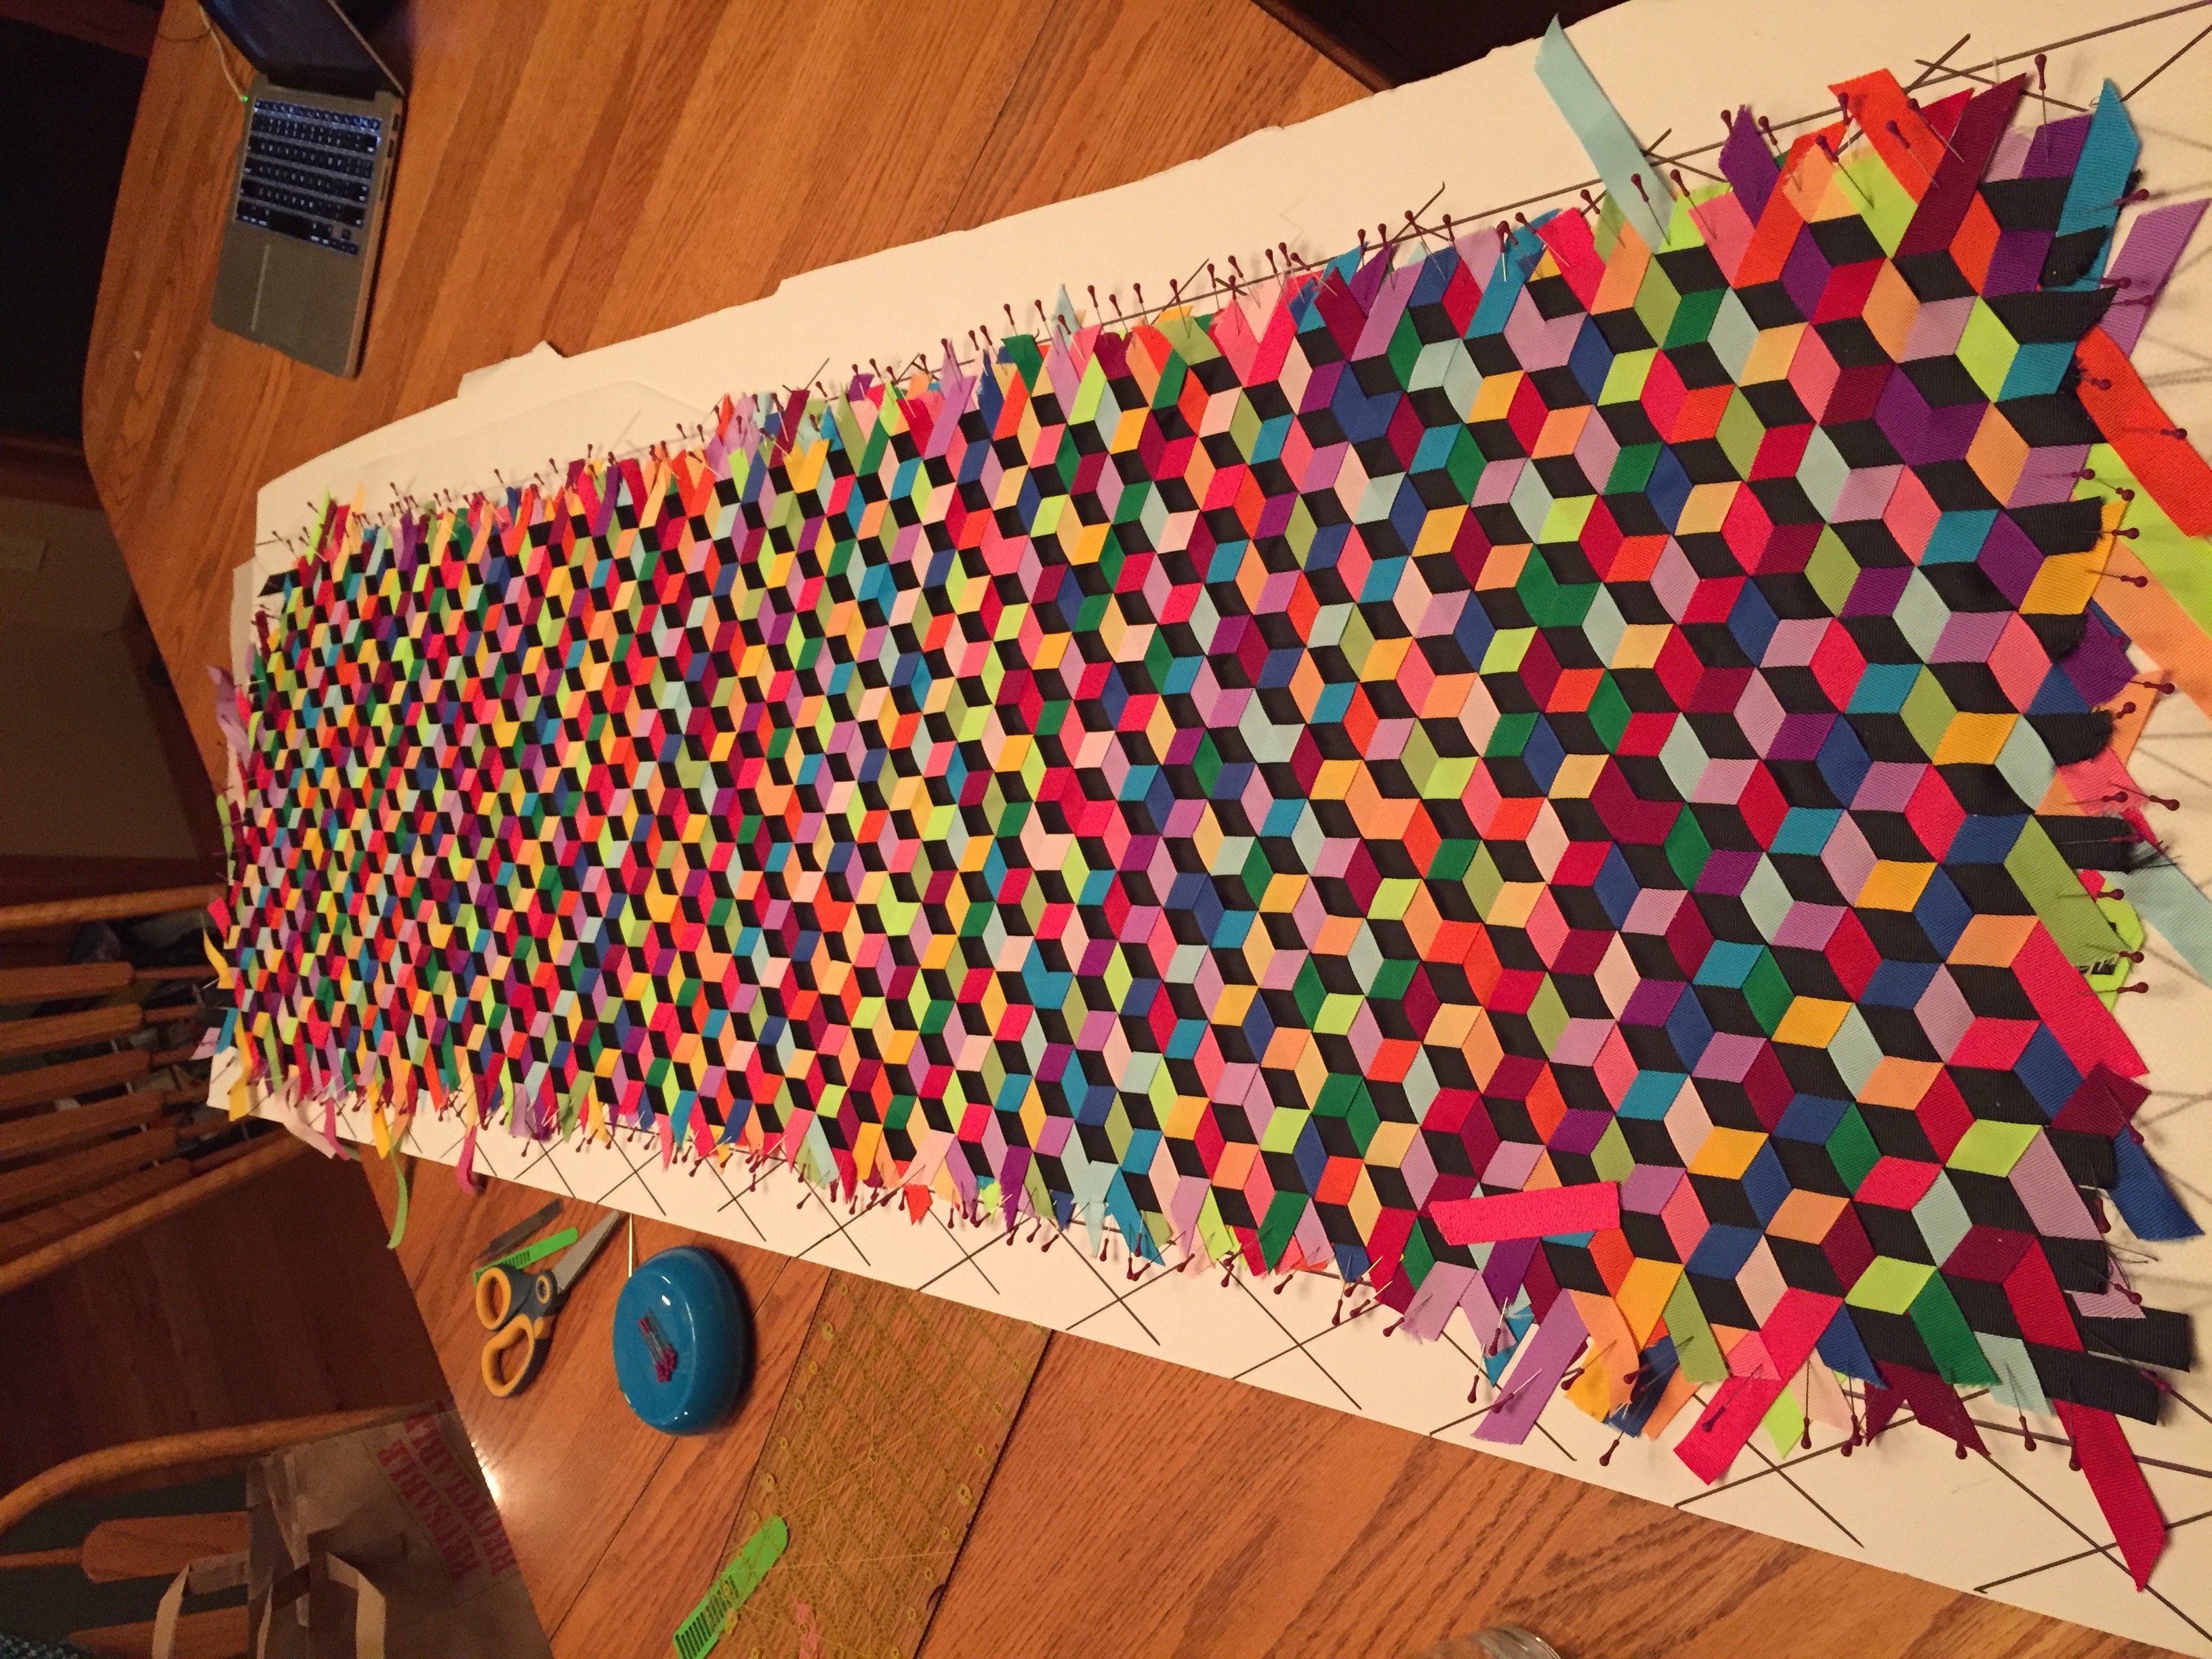

After the weaving was complete, I ironed the ribbon to the backing, removed all the pins, sewed around the outside edge of the stole pattern (ribbon side down on the machine and using the drawn image as a guide) and cut it out. If you look closely, you’ll see a yellow sewing line on the fabric.
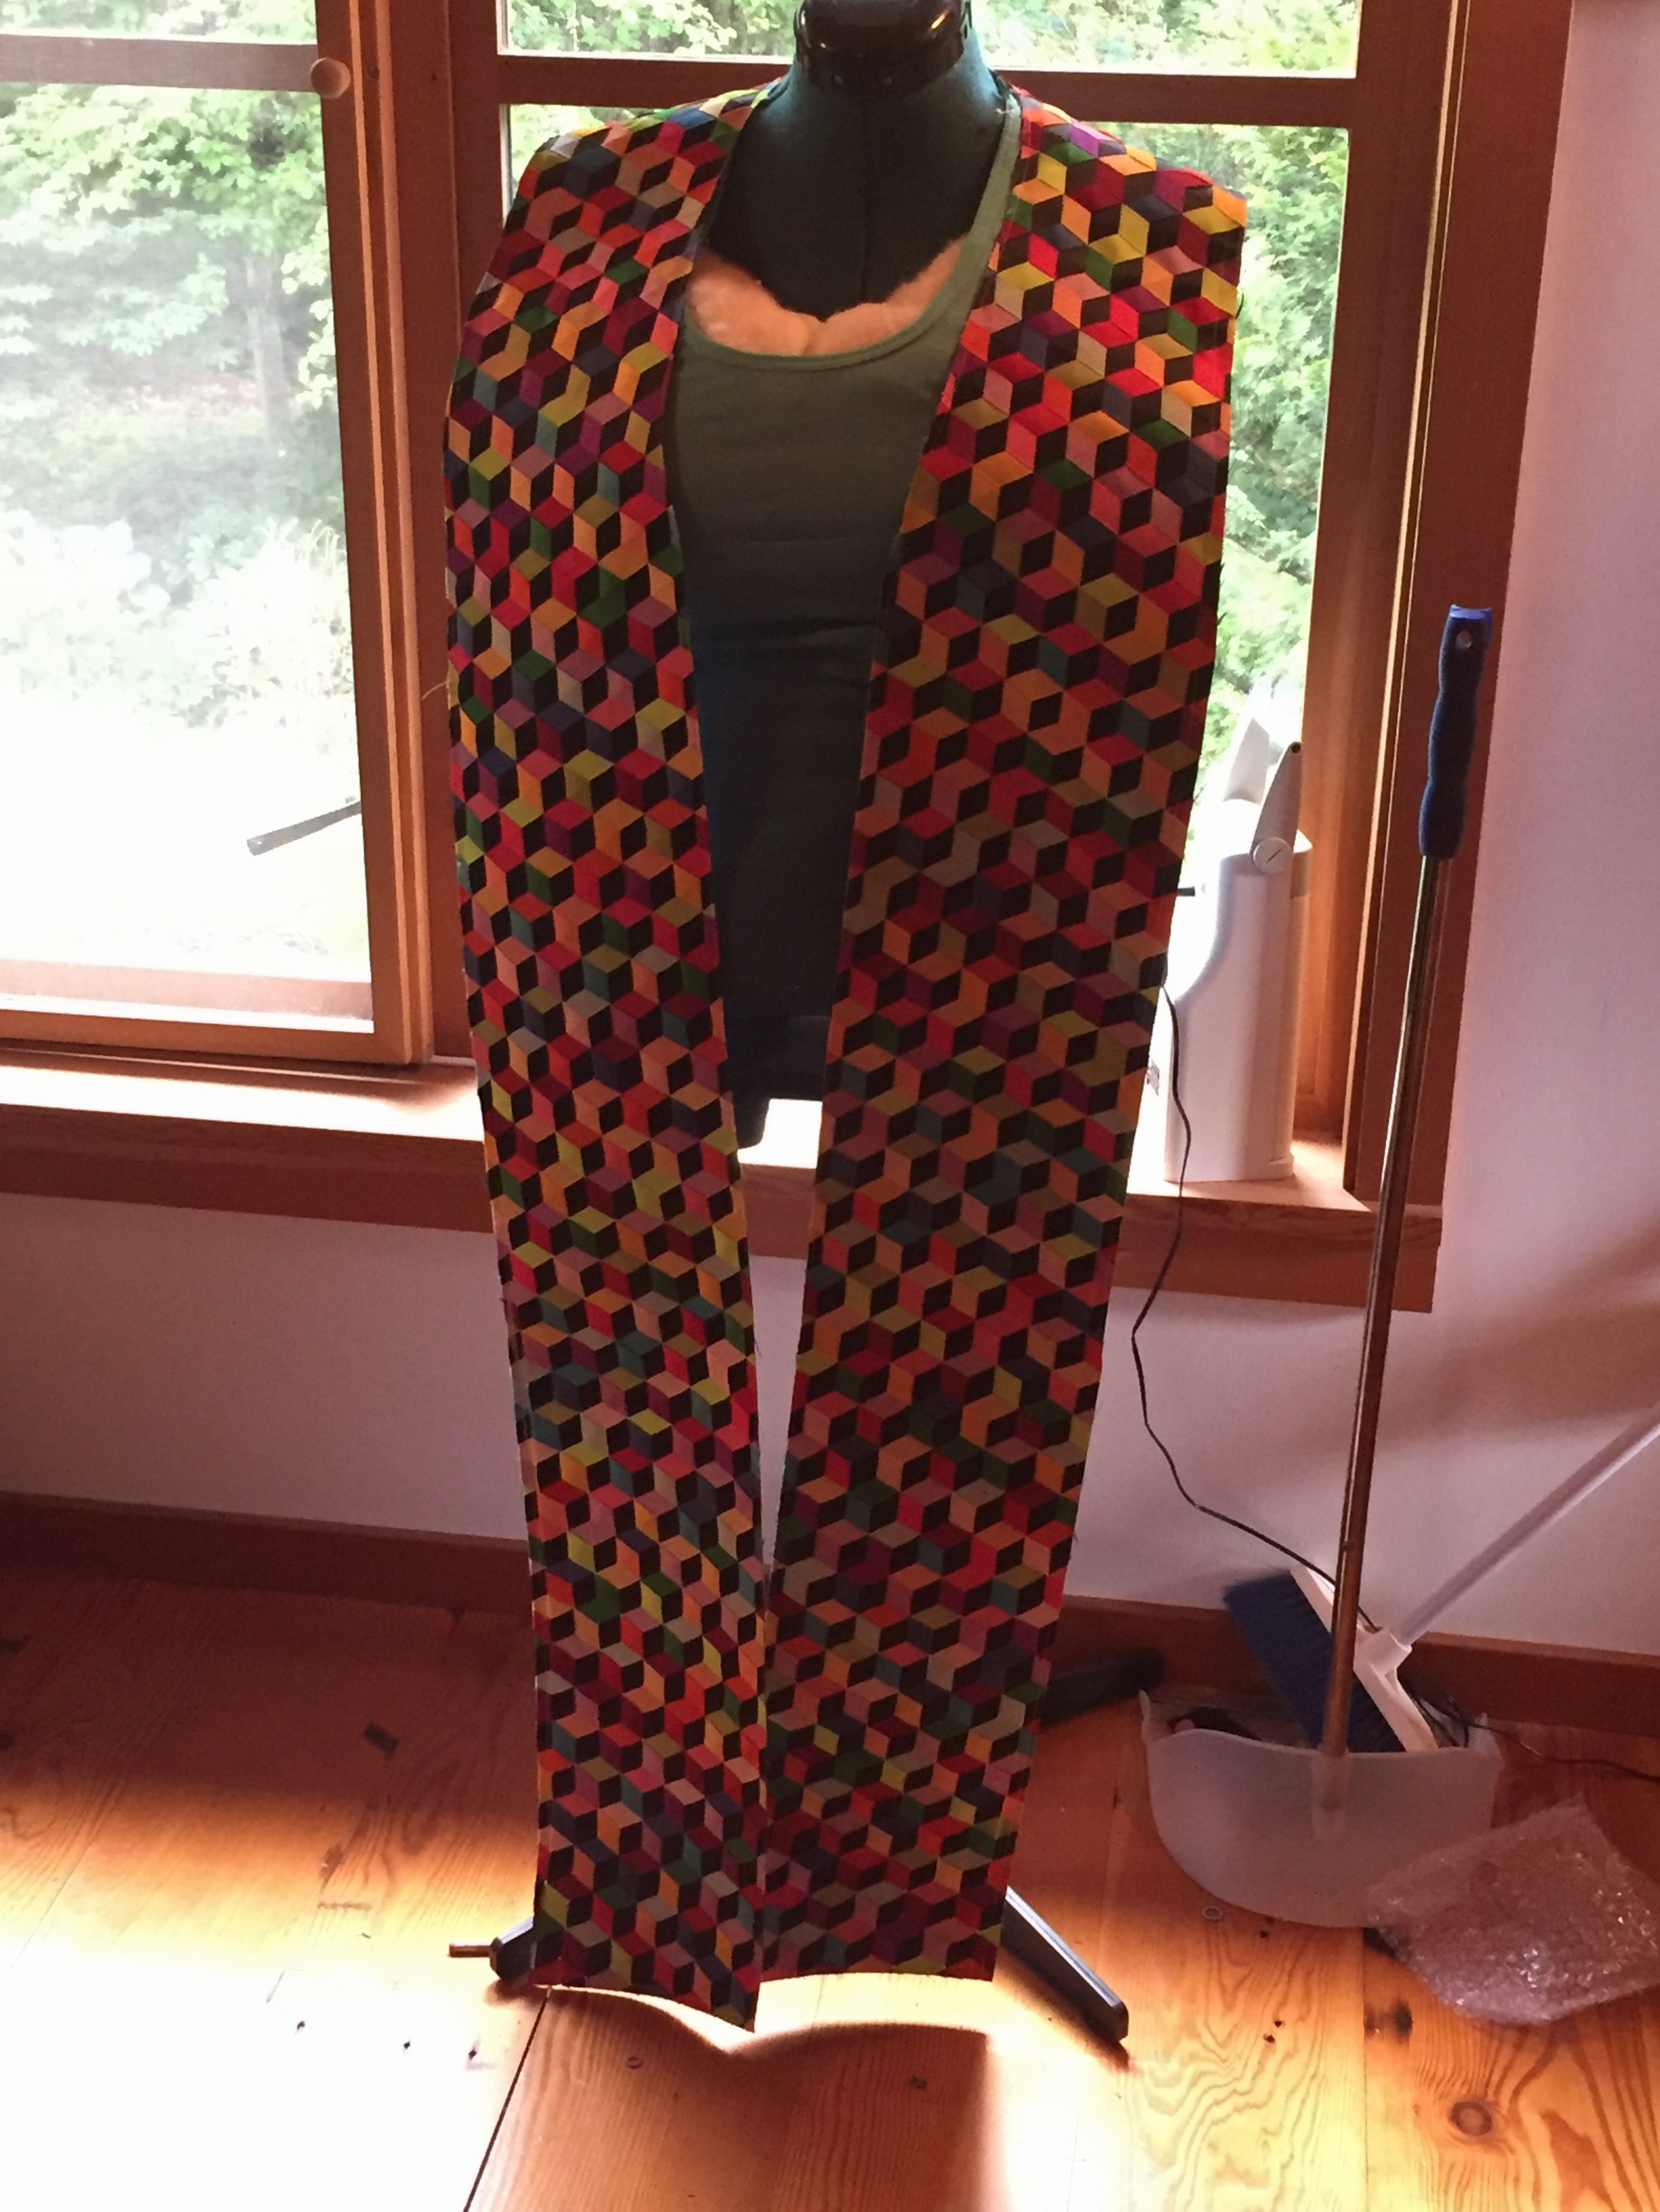
After sewing the two pieces together, I let it hang on my mannequin for a while. I was mostly terrified of the final construction details. I had not considered the weight and thickness of the fabric. Three layers of grosgrain ribbon is thick and heavy. I had black kona cotton for the inside lining, and it felt like tissue paper in comparison to the heavy fabric I had woven. Finally, with about a week away from the presentation of the gift, I got up the nerve to create the lining and sew it all together. It worked out just fine in the end.
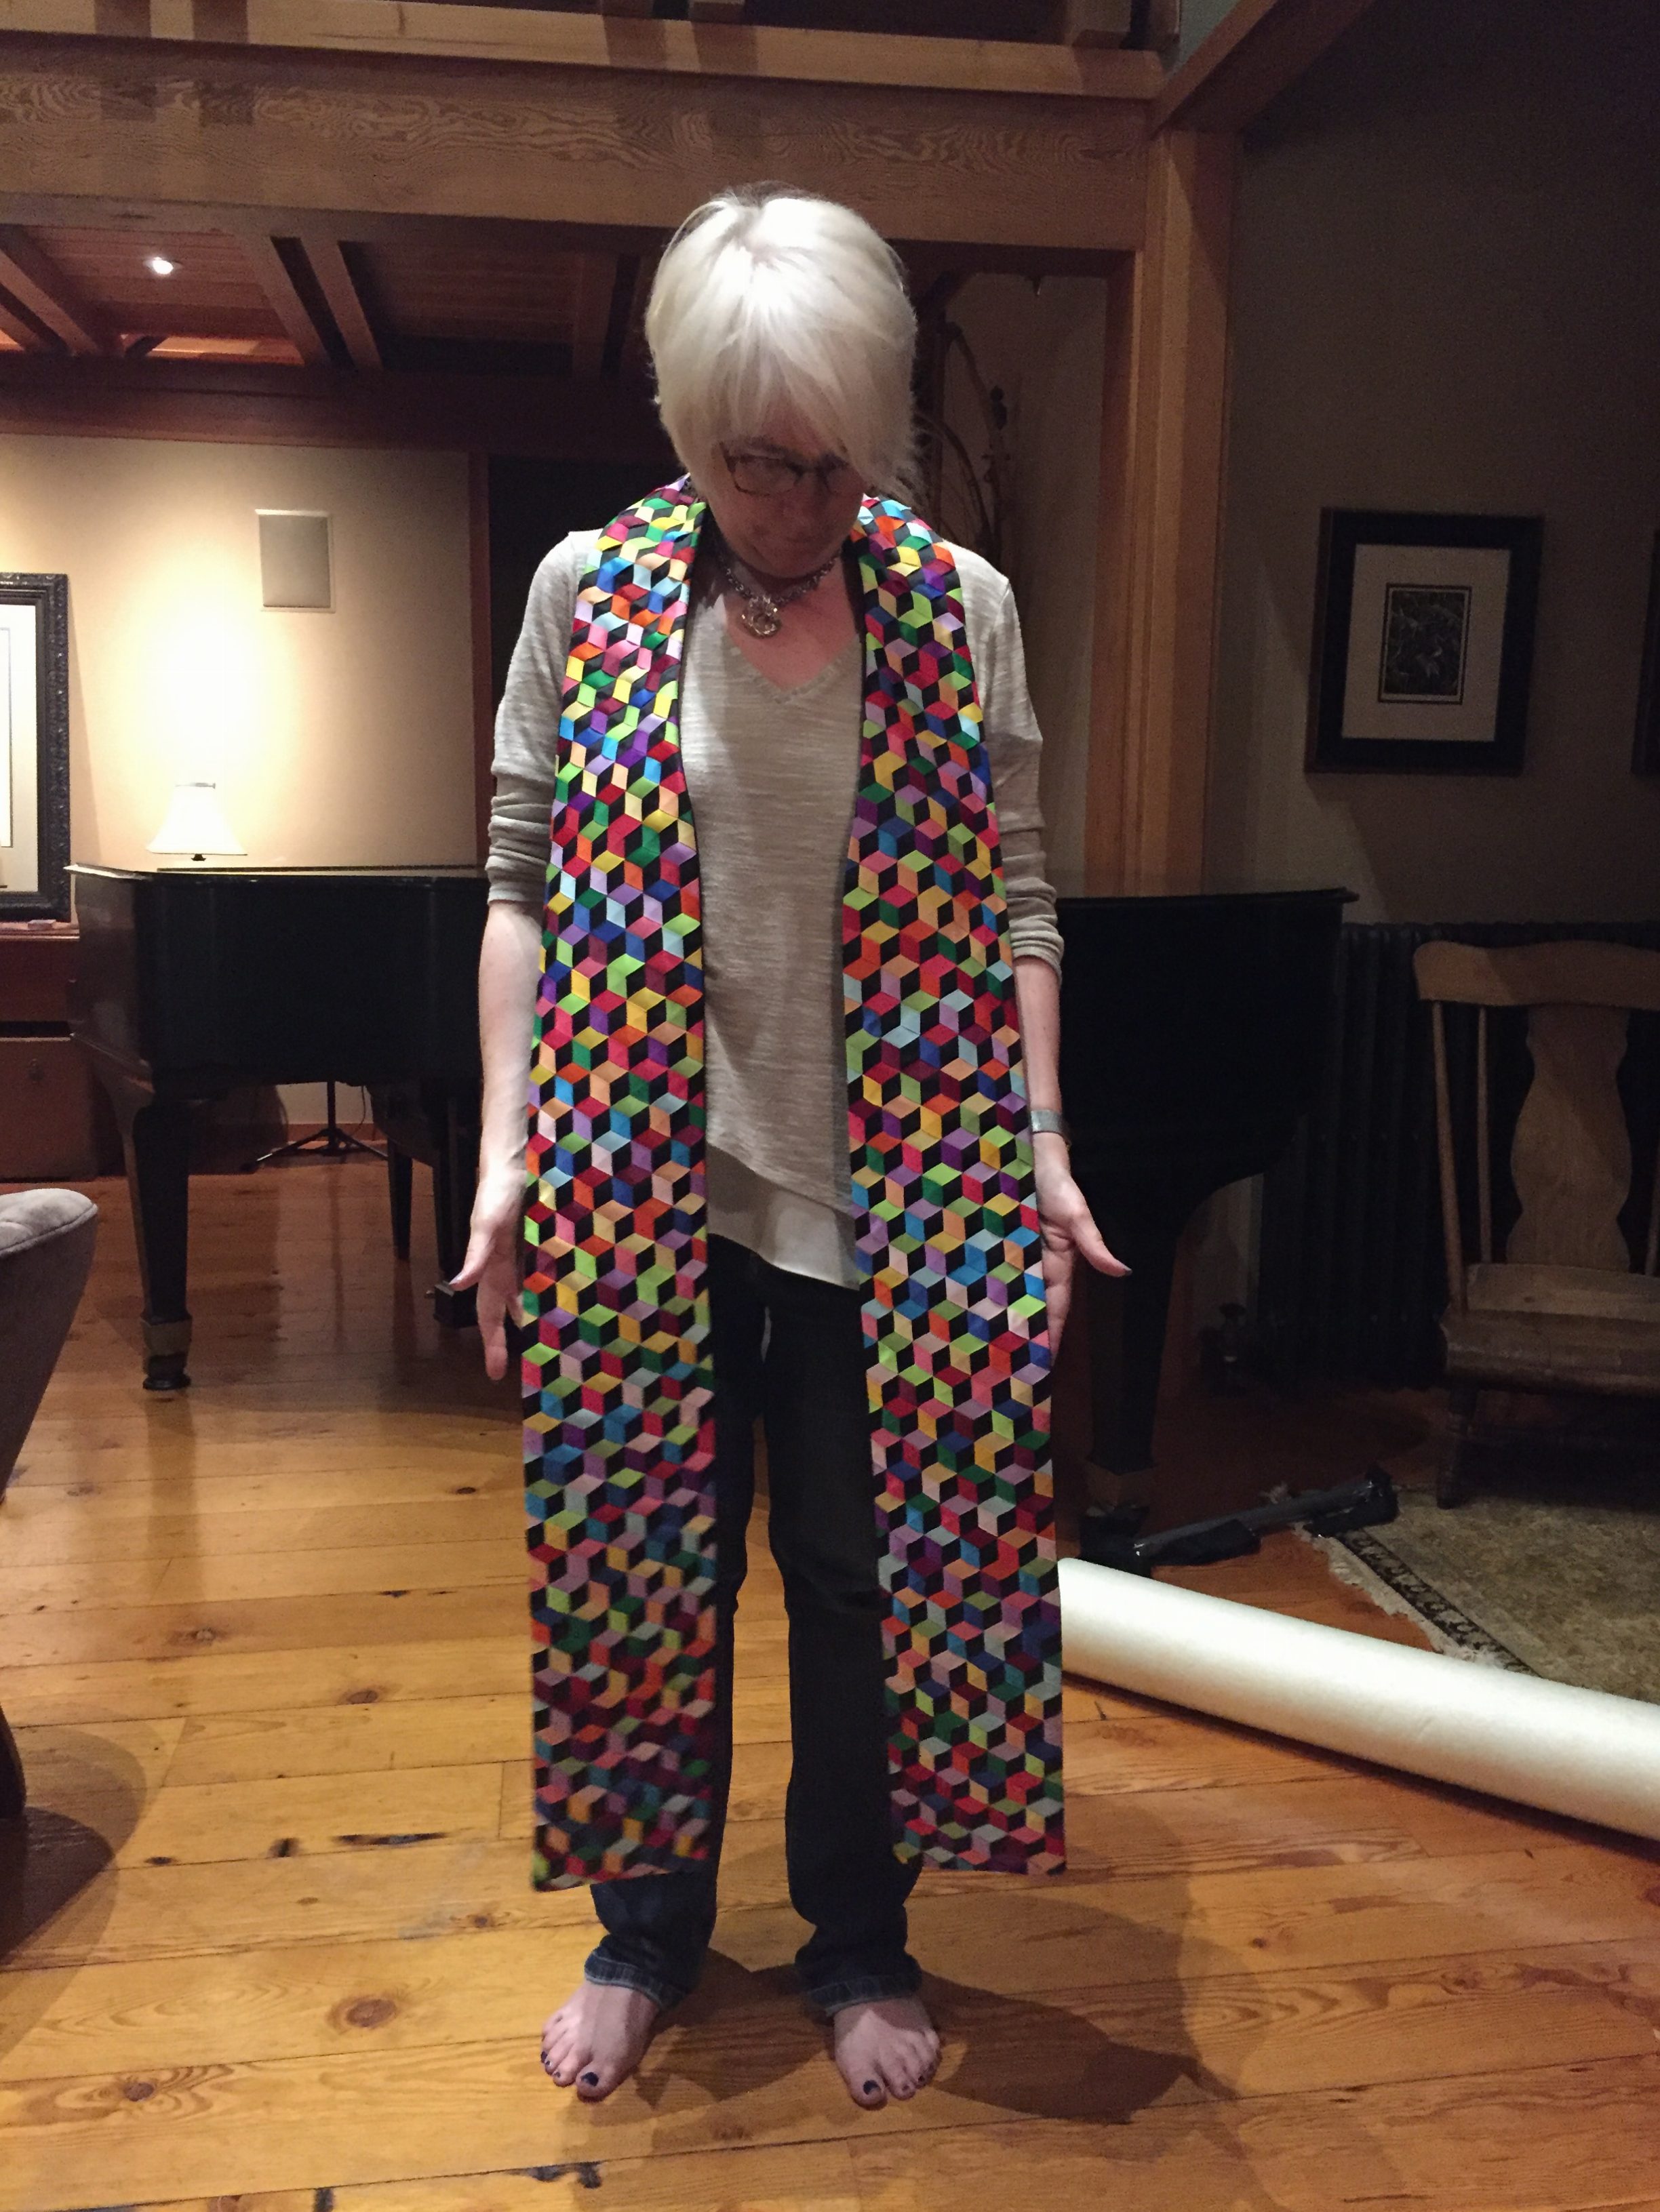
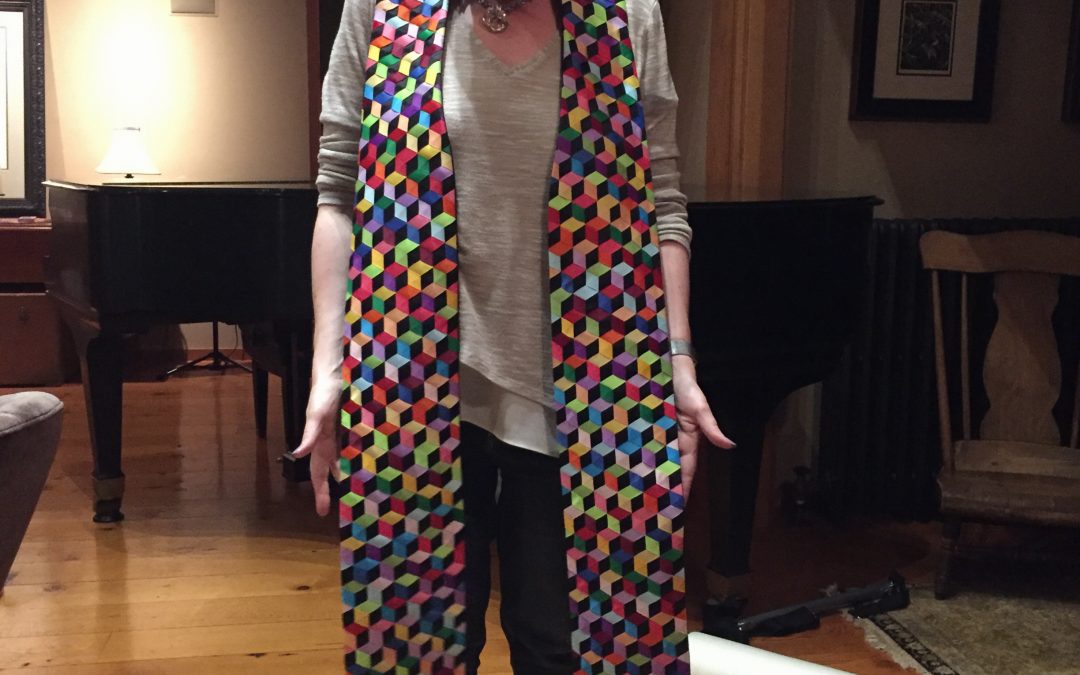
And this is me with the finished stole.
People have asked how long this took to complete. I’m going to estimate it as about thirty hours start to finish of actual hands-on time.
Recent Comments